
Read to launch your Group Trips? Publish and share your beautiful Itineraries.
.png?width=350&name=Black%20Moon%20Blog%20Banner%20(61).png)
Congratulations! You're ready to get people excited about your trip, booked in and prepared for their trip. This checklist provides a few pointers to make this process easier so you can focus on planning the next one!
Step 1. Trip Users
Co-planners make life easier
- The SETTINGS page allows you to see all the users which can access the Trip
- Click on the +ADD USER icon in the top right.
Users are not always Travelers. Some users are here to help you mange the trip:
- Trip Coordinator: who can view the TRIP, COMPLETED TASKS and PAYMENTS
- Co-Planner: Users who can update the TRIP
- Team Member: Users within your TEAM.
Step 2. Invites & Promotion
Spread the word!
- You can add Travelers to a PRIVATE TRIP by clicking on the PEOPLE icon. In the top right, click ‘+ADD PERSON’. You can also BULK UPLOAD Travelers.
- Send all Travelers an invite to them from the PEOPLE screen.
- Use the link provided by clicking on SHARE TRIP to spread the word about PUBLIC TRIPS.
For more information check out our Trip Registration article.
Check out this video for heaps of different features!
- You can personalize pricing on the PEOPLE page.
- You can also individually show of Itinerary items from the HIGHLIGHTS & ITINERARY page.
Step 3. What Does a Traveler See?
Remember the PREVIEW AS REGISTERED?
NOTE: Different Travelers can see different things based on your SETTINGS. View a Trip as any of your Travelers from the PEOPLE page.
- CUSTOMIZED TRIPS - Drill into each page as the Traveler to check custom payment schedules or Tasks.
- VIEW AS - Remember if you VIEW AS A TRAVELER, your Preview will remember the last person you Viewed As. To see the same thing prospective registrations will see, open your Journey in an “Incognito” or “Private” browser.

Step 4. List Your Trips
Open your trip for business!
- You can list your PUBLIC TRIPS on the UPDATE TRIP page by checking the 'LISTED' option. Listing your trips means your TRIP CARDS will show up on your Trip Collection website page and everywhere you have them embedded/integrated (see below). Listed trips automatically disappear once the TRIP DATE has passed.
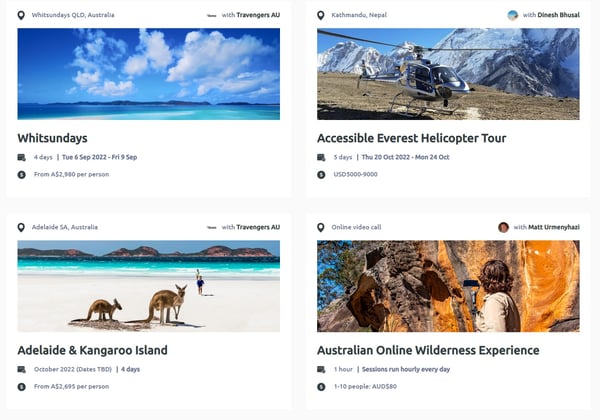
Here is an example of TRIP CARDS:
NOTE: If you're trip is in line with YouLi guidelines, it may also be highlighted in our Client Showcase and social channels.
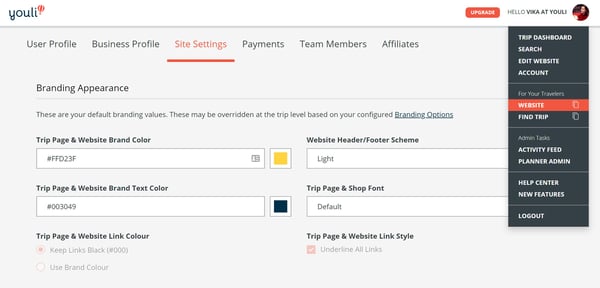
- With YouLi, you get a Trip Collection website page which lists all of your PUBLIC LISTED TRIPS for Travelers to browse and register for. You can white-label that website by activating YouLi PRO+ Website subscription.
- Your Trip Collection website can be shared with travelers as a menu linking to all your currently available BOOKING PAGES or BROCHURE trips. Making it easy for them to get all the information they need about your Trips.
Step 5. Integrate or Share
Spread the good word!
Integrating your trips will allow you to reach more potential Travelers.- Socials or Link from your Website - Share the PUBLIC TRIP link on your social media accounts to spread the word. Learn More
- Integrate/embed - From the SHARE TRIP pop up you can copy the WEBSITE SNIPPET to use on your website.
Need more help?
Reach out to the YouLi Support Team via the chat box at the bottom of your screen or submit a Support Ticket request. If you need more advanced support, schedule a 1:1 Consulting session with one of our experts, and we will walk through Traveler flow options & best practices.